Whether you prefer the slow burn of hemp or the tasteless purity of rice paper, crafting your own rolling papers allows for a level of customization and personalization that mass-produced options can’t match.
Imagine selecting your materials with care, tailoring the size, flavor, and burn rate to suit your exact preferences. Envision adding a hint of lavender or mint, not from a pre-flavored packet, but from your own kitchen or garden. This isn’t just about smoking; it’s about engaging in a tradition that spans centuries, adapted to reflect your unique style and preferences.
How To Make Your Own Rolling Papers
To make your own rolling papers, select a natural material like rice or hemp paper, cut it to size, and apply a homemade, non-toxic glue made from ingredients like cornstarch and water along one edge. This process allows for customization in size, flavor, and burn rate.
Choosing Your Paper Materials
When it comes to crafting your own rolling papers, the choice of material plays a pivotal role in defining the quality and enjoyment of your smoking experience.
Not all papers are created equal, and the selection of the right base is as crucial as the blend it encases. Let’s delve into the primary materials you might consider: rice paper and hemp paper, each with its own set of characteristics, benefits, and nuances.
Rice Paper
Rice paper stands out for its thinness, almost ethereal quality, making it an excellent choice for those who prefer a clean, unadulterated taste. Its subtlety doesn’t interfere with the natural flavors of your tobacco or herbal blends, allowing for a pure smoking experience.
Made from rice and other fibers, rice paper burns slowly and evenly, a desirable trait that reduces the need for frequent relighting and ensures a prolonged enjoyment of your roll. Its delicacy, however, means it requires a gentle touch during the rolling process to avoid tears.
Hemp Paper

Hemp paper, on the other hand, champions durability and environmental sustainability. Crafted from one of the most versatile plants known to man, hemp rolling papers are strong, yet provide a smooth burn.
They’re slightly thicker than rice papers, offering a bit more forgiveness during rolling. Many users note a slight sweetness in hemp papers, which can complement or enhance the natural flavors of your smoke.
Beyond the smoking experience, opting for hemp paper aligns with eco-friendly practices, given hemp’s renewable nature and the minimal environmental impact of its cultivation and processing.
Considerations for Choosing Your Material
When selecting between rice and hemp, consider the following aspects:
- Taste and Aroma: If purity of flavor is your priority, rice paper might be your best bet. For a slight sweetness and robustness, hemp could be more to your liking.
- Burning Rate: Both materials offer a slow burn, but the thickness of hemp might provide a bit more control over the pace.
- Environmental Impact: Hemp is highly sustainable, making it an excellent choice for the environmentally conscious.
- Durability: If you’re new to rolling or prefer a forgiving material, the resilience of hemp paper might be advantageous.
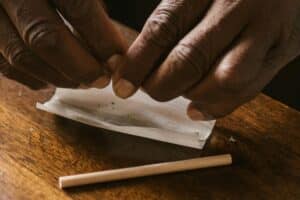
DIY Rolling Paper Process
making your own rolling papers is a craft that combines tradition with a personal touch. Whether you’re drawn to the delicate nature of rice paper or the robustness of hemp, the process of creating your bespoke papers is straightforward and rewarding. Also, it can be fine-tuned over time to suit your rolling and smoking preferences.
Here’s a step-by-step guide to crafting your own rolling papers:
Step 1: Gather Your Materials
Before you begin, ensure you have all necessary materials at hand. You’ll need:
- Your chosen paper material (rice or hemp)
- A sharp cutting tool, such as scissors or a paper cutter
- A ruler for precise measurement
- Non-toxic glue or a natural adhesive (gum arabic or cornstarch water mixture)
Step 2: Cutting Your Papers
Decide on the dimensions of your rolling papers. Standard sizes vary, but a common dimension is about 3 inches by 1 inch. Using your ruler and sharp cutting tool, carefully cut your material to size. The precision here will aid in consistency and ease of rolling later on.
Step 3: Preparing the Adhesive
A crucial aspect of rolling papers is the adhesive strip that seals the paper once rolled. For a natural and safe option, you can create a simple adhesive from cornstarch and water. Mix a small amount of cornstarch with water, heat it until it forms a thin paste, and let it cool. This paste can be applied thinly where the paper will be sealed.
Step 4: Applying the Adhesive
With a small brush or the tip of your finger, apply a thin line of your adhesive along one edge of the cut paper. The key here is moderation; too much glue can make the paper difficult to seal and burn unevenly, while too little might not hold the paper together.
Step 5: Drying Your Papers
Once the adhesive is applied, allow the papers to dry completely. This step is crucial; damp papers can tear easily and will not burn correctly. A flat, dry surface away from direct sunlight is ideal for this stage.
Step 6: Storage
After your papers have dried, store them in a cool, dry place. A book or any other flat surface can be used to press the papers down and keep them from curling. Keeping them in an airtight container will also protect them from moisture and ensure they remain in perfect condition until you’re ready to use them.
Pro Tips:
- Practice makes perfect. Your first few attempts might not be flawless, but each paper will get better with practice.
- Consider experimenting with the thickness of the paper and the amount of adhesive to find what works best for your rolling style and preferences.
- For those interested in flavors, natural essences or dried herbs can be incorporated into the adhesive for a subtle taste.
Adding Flavors and Customization
The art of rolling your own papers offers a canvas for creativity, not just in the choice of material but also in flavor and design. Adding flavors and customization to your rolling papers can elevate your smoking experience, making each session uniquely enjoyable.
Here’s how you can infuse personal flair into your homemade papers:
Adding Flavors
The essence of your smoking experience can be significantly enhanced with the addition of natural flavors. Unlike commercial flavored papers, which often use artificial additives, you can choose organic and natural alternatives for a cleaner, more authentic taste.

- Natural Oils and Extracts: A drop or two of food-grade essential oils or natural extracts can be added to your adhesive mixture. Consider flavors like mint, lavender, or citrus for a refreshing twist. Ensure any additive is safe for consumption and combustion.
- Herbs and Spices: Dried herbs and spices can also be incorporated into your papers. Rubbing a dried lavender bud or mint leaf along the paper can impart subtle flavors without overwhelming the natural taste of your smoke.
- Tea Infusions: Soaking your papers in a mild tea solution can give them a unique flavor. Chamomile, green tea, or jasmine are excellent choices for their gentle and aromatic qualities. Ensure the papers are thoroughly dried after soaking to maintain integrity during rolling.
Customization
Beyond flavor, customizing the appearance of your rolling papers can add a personal touch to your smoking ritual. While intricate designs may require professional printing techniques, there are simple ways to personalize your papers at home.
- Stamps and Inks: Using food-grade inks and small stamps, you can add patterns or symbols to your papers. Ensure the ink is fully dry and non-toxic when burned.
- Handwritten Messages: A small, non-toxic, fine-point pen can be used to write names, dates, or messages along the edge of your papers, adding a personal note or making a special occasion even more memorable.
Tips for Success
- Test Flavors First: Before committing to a large batch of flavored papers, make a few test rolls to ensure the taste aligns with your preferences.
- Quality Control: Ensure all materials used for flavoring or customization are safe for inhalation. Research and source your materials carefully.
- Subtlety is Key: When it comes to adding flavors, less is often more. Aim for a hint of taste rather than overwhelming the natural aroma of your tobacco or herbs.
Storage and Preservation
After crafting your own rolling papers with care and customization, proper storage and preservation become crucial to maintain their quality over time. The goal is to ensure that your papers remain dry, flat, and ready to use whenever you need them. Here are some essential tips for storing and preserving your homemade rolling papers.
Keep Them Dry
Moisture is the enemy of rolling papers. It can make them stick together, become brittle, or even moldy. To prevent this, store your papers in a dry place. Silica gel packets, often found in packaging for electronics or shoes, are excellent for absorbing any excess moisture and can be placed wherever you store your papers.
Protect from Light and Heat
Direct sunlight and heat can degrade the quality of your rolling papers over time, affecting their texture and burn rate. Store your papers in a cool, dark place, such as a drawer or a cabinet, away from windows or heat sources.
Flat Storage
Rolling papers are best kept flat to prevent curling or crumpling, which can make them difficult to roll. Use a heavy book, a dedicated paper press, or simply the original packaging to keep them flat. If you’ve made a larger quantity, consider using a binder or a folder with plastic sleeves for organization and protection.
Airtight Containers
An airtight container can provide the ultimate protection against moisture, dust, and odors. Ziplock bags, plastic containers with tight seals, or even vacuum-sealed bags are great options. For added protection against odors, include a small sachet of baking soda in the container.
Handling Care
When you take papers out to use, ensure your hands are clean and dry. Oils and dirt from your hands can transfer to the papers, affecting their quality and how they burn.
Long-term Storage
If you’re storing rolling papers for extended periods, consider placing them in an environment where temperature and humidity are relatively stable. Basements and attics can experience significant fluctuations in these conditions and may not be ideal unless they are climate-controlled.
Advanced Tips: Making Your Own Glue
For those who have ventured into the craft of making their own rolling papers, taking the next step to create your own natural glue is a game-changer. Not only does it ensure that your entire rolling paper is organic and free from harmful substances, but it also allows for further customization of your smoking experience. Here’s how to make and apply your own natural adhesive for rolling papers.
Ingredients and Materials
- Cornstarch or Gum Arabic: These are excellent bases for homemade glue due to their natural and safe properties.
- Purified Water: To mix with your base and create the adhesive.
- Small Pot and Spoon: For mixing and heating your adhesive.
- Fine Brush or Cotton Swab: For applying the glue to your papers.
Making Cornstarch Glue
- Mix: Combine one part cornstarch to four parts water in your small pot. For a small batch, a teaspoon of cornstarch to four teaspoons of water will suffice.
- Heat: Stir the mixture over low heat until it starts to thicken. This shouldn’t take long, so keep an eye on it to avoid clumping.
- Cool: Once it reaches a glue-like consistency, remove it from the heat and let it cool. You can transfer it to a small container for easier application.
Making Gum Arabic Glue
- Mix: Gum Arabic is a bit stronger, so use a ratio of one part gum Arabic to two parts water.
- Dissolve: Instead of heating, simply stir until the gum Arabic is fully dissolved. This might take longer, but it ensures a smooth consistency.
- Store: Transfer to a container once fully dissolved and clear.
Application Tips
- Precision: Use a fine brush or cotton swab to apply a thin strip of glue along one edge of your rolling paper. The key is consistency; too thick a layer can affect how it burns.
- Testing: Before going into full production, test the glue on a piece of paper to ensure it adheres well and dries as expected.
- Storage: Your homemade glue can be stored in a tightly sealed container for several weeks. If it thickens, a little warm water can revive it.
Working With A Manufacturer
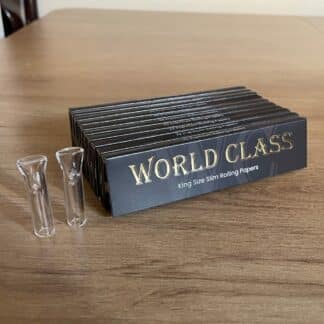
Another option you could choose that allows you total creative freedom without the responsibility of creating the papers and packing yourself is working with a manufacturer. The Great American Rolling Paper Company (GARPUSA) is the manufacturer I trust the most.
I worked with them to create World Class rolling papers and they also work with other top brands that you’ve likely heard of. If you want to see what’s possible, you can purchase a sample pack that has a large variety of sizes, materials, designs, and styles.
These are not affiliate links and they don’t pay me to say this. I wouldn’t recommend this company or anything else to anyone if I didn’t have a good experience with it first. If you want to work with a rolling paper manufacturer, you should consider GARPUSA.
Final Thoughts
Making your own rolling papers and glue is more than just a pathway to a personalized smoking experience; it’s a celebration of craft, a nod to tradition, and a step towards more sustainable, conscious consumption.
From selecting the perfect materials to applying your own natural glue, each step offers an opportunity to infuse a bit of yourself into the process. As you master these skills, you not only create a product that is uniquely yours but also deepen your appreciation for the art of rolling.
Whether for the sake of creativity, health, or sustainability, making your own rolling papers is a deeply rewarding endeavor that elevates the smoking experience to an art form.